Blogmas #6 – DIY natural christmas ornaments

DIY natural christmas ornaments

Another day, another Blogmas. I must admit that this December is going by so quickly I’m hardly keeping track as it is. Next week, the real party season starts so I’m keeping my fingers crossed that I manage to finish the entire Blogmas as I intially intended. Today, I want to show you how to make really simple DIY natural christmas ornaments.

DIY natural christmas ornaments

For the ones I want to show you, you’ll need some glitter (or glitter glue), oranges, walnuts, scissors, glue gun (or superglue) and string. You’ll also need the ingredients to make the salty dough: 300g of salt, 300g of white flour, a tablespoon of oil and 2dl of water.

DIY natural christmas ornaments

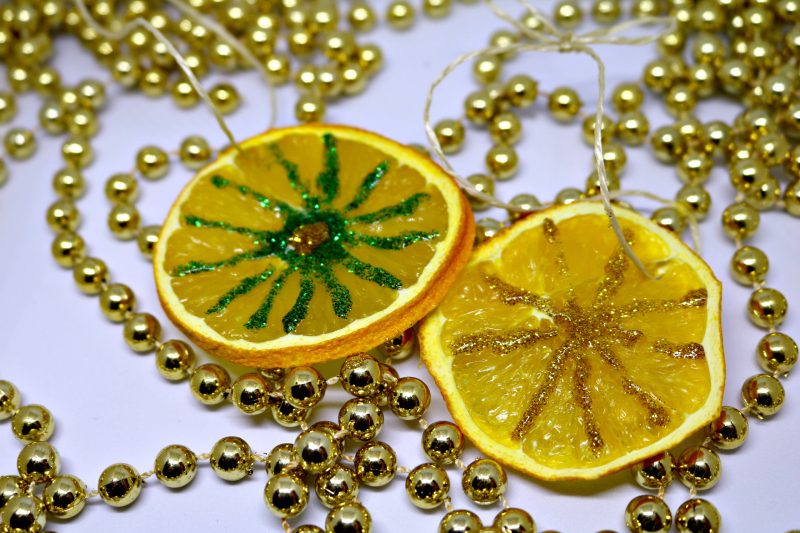
Dry oranges are literally the simplest christmas decoration, but I personally love the way they look. Cut the oranges into thin slices and dry them overnight on a body of heat. Pierce them with a knife to cut holes for a simple string. You can also decorate them with glitter or leave them bare – they’ll look cute either way.

DIY natural christmas ornaments

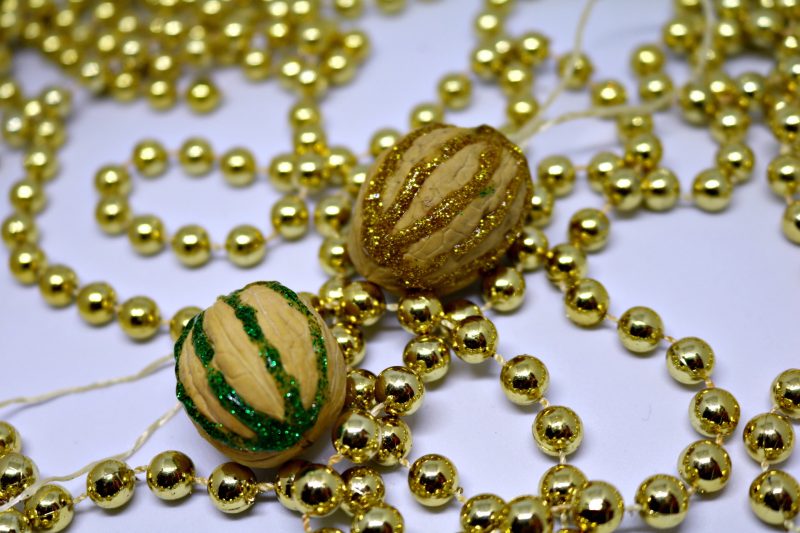
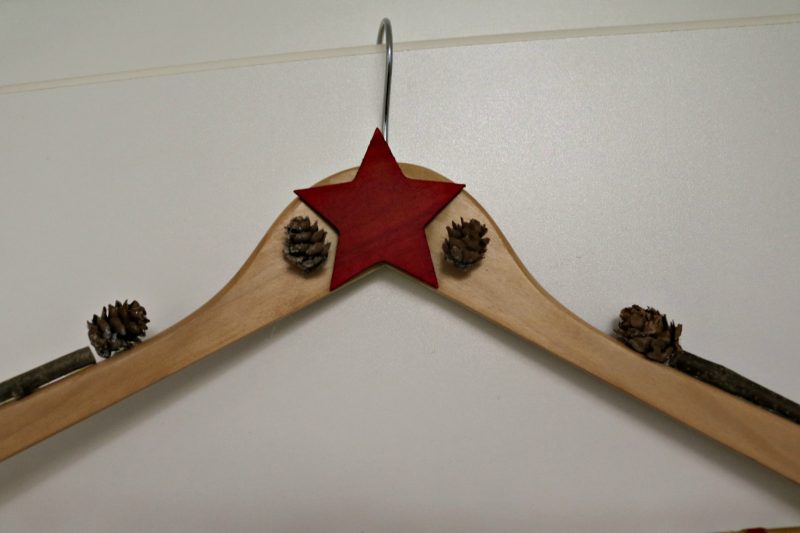
The same can be done with walnuts, but you’ll need a glue gun or a superglue to hold the strings in place. Remember to ask an adult to help you with this if you’re not used to handling hot glue.

DIY natural christmas ornaments

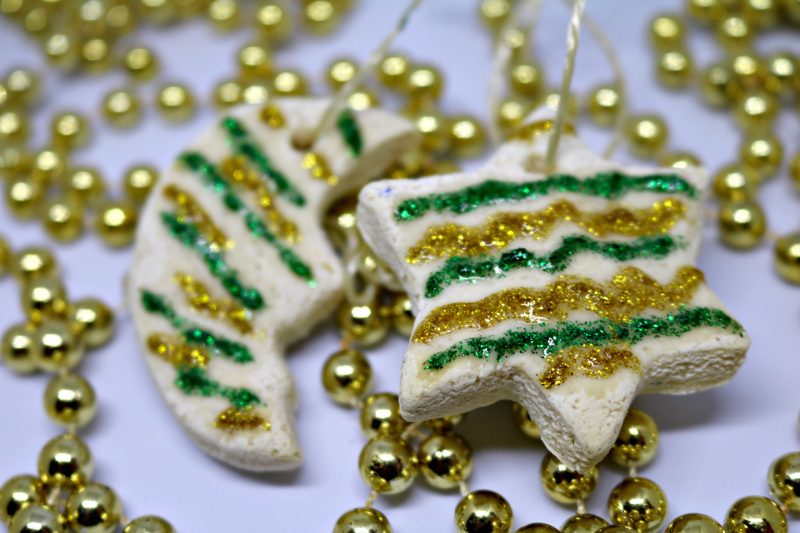
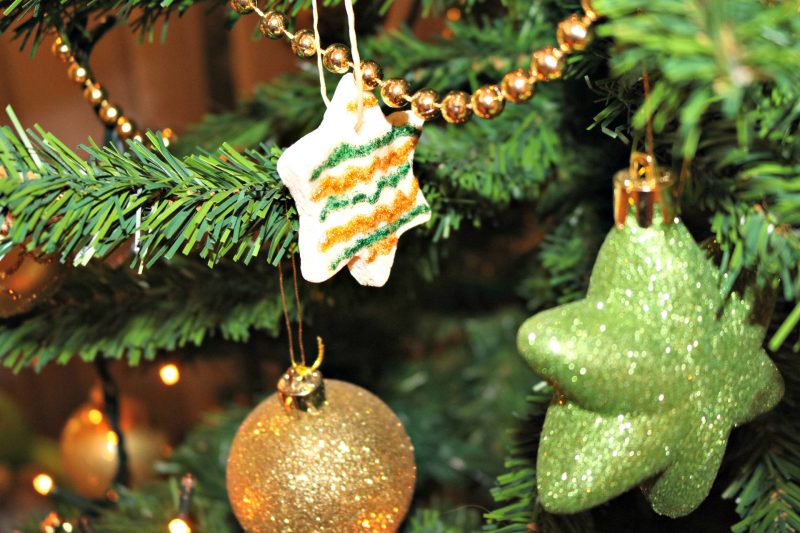
These ornaments are done from the salty dough. You simply mix all the ingredients together, roll the dough and use some stencils to cut out the desired shapes. Then, bake them at 180* for 20 minutes or so and let them dry. You can them color them with glitter, nail polish or whatever else you have lying around the house.

DIY natural christmas ornaments

DIY natural christmas ornaments

Do you have a christmas tree? How do you decorate it? Let me know in the comments down below! Until next time, stay beautiful!


Blogmas #5 – Gift guide: top 20 X-mas gifts under 20€

top 20 X-mas gifts under 20€

Today, I won’t bore you with long and detailed introductions. I know that most of us don’t have any trouble finding the presents for our loved ones, but sometimes we need some help. So today, I want to give you some ideas with 5 gifts for him, her, home and beauty ~ all under 20 €. Of course, I’m dying to know if you’ve found any cool gifts this year yourself ~ please, let me know in the comments below! So here they are – top gifts under 20€.

top 20 X-mas gifts under 20€ – for her

#1 – Broškolini hand made pin (Smile Concept Store, around 14€)

top 20 X-mas gifts under 20€ Broskolini Smile Concept Store

#2 – Flower Vase for a bicycle (Flat Concept Store, around 16€)

top 20 X-mas gifts under 20€ flower vase for bike

#3 Shopping Tote by Loqi (1001 dar, around 10€)

top 20 X-mas gifts under 20€ Loqi bag

#4 Unique Ring Holder (Flat Concept store, around 15€)

top 20 X-mas gifts under 20€ Ring holder

#5 Coffee sign (Les Stilldeco, around 13€)

top 20 X-mas gifts under 20€ coffee sign

top 20 X-mas gifts under 20€ – for him

#1 Book about hygge and happier living (Mladinska knjiga, 20€)

top 20 X-mas gifts under 20€ hygge mladinska knjiga View Post

Blogmas #4: DIY Make-Up Christmas Cards + getting personal

DIY Make-Up Christmas Cards

Today, I want to share a personal story while at the same time showing you how to make DIY Make-Up Christmas cards with things you already probably have at home. I still write Christmas cards and I used to write many, many more ~ which is what I want to share with you today.

DIY Make-Up Christmas Cards

To make the cards, you will need: some paper, make-up sponges, eye liners and/or lip liners and nail polish. You could use any paper, but I used a thicker version so that the nail polish didn’t bleed through. It only took me about 10 minutes per card so I think you could do a lot if you want to and still have them ready in time.

DIY Make-Up Christmas Cards

For this first card, I used a make-up sponge to create an ombre effect with three different colors of nail polish. I then used a white eye liner pen to ink in the stars. You could also dab some glittery eyeshadow on the stars, but in that case I suggest you fix it with a transparent top coat nail polish.

For many many years now, I used to write Christmas cards for my grandmother. She had shaky hands and didn’t pride herself in her handwriting so I did it for her. I used to buy Christmas cards, go to her house and we would decide on the text together. Then, I would write and write until my hands got sore. But we drank coffee and gossiped and the time flew by.

DIY Make-Up Christmas Cards

For this DIY Make-Up Christmas card, I used a precisely cut make-up sponge shaped like a triangle and tried to create some poinsettias. I am definitely not an artist but I think you can still tell what I was trying to do there and I personally think it looks cute. I then used some silver nail polish to fill in the blank spaces.

Every year, we had a little “fight” over who she is going to send the cards to. She was very frugal when it came to herself (but was always incredibly generous when it came to other people) and as she didn’t want to waste money, she wanted to drop people from the list and I didn’t let her. At the end of the day, I always lied to her about how much the cards and the stamps cost because she already have at least 50€ ready to reimburse me for my “costs”. When I told her that was way too much, she would stuff that 50€ in my pocket and tell me to “buy myself something nice”. She gave me allowance well into my 30’s. That’s the kind of person she was. Always thinking of others, putting others first, loving everyone.

DIY Make-Up Christmas Cards

This card was made with eye liner for the strings and different nail polishes for the ornaments. I think you could use a thinner brush to create some designs on the ornaments as well. I finished everything off with two golden borders which tie everything together nicely.

On April 11th, my grandmother passed away after a sudden illness. We almost lost her to a series of unfortunate events 20 years ago and I was incredibly lucky to have these additional decades with her. She taught me so much about life. But still, I wasn’t ready. And after more then six months, I’m still crying when I’m writing these lines. She was one of my best friends and I could always, always count on her. I loved her so much and I miss her every single day. At the end on the night when he’s already fast asleep, baby M always gets a big kiss from his mum and I also give him one for my grandmother who’s looking out after us from a place far, far away. I’m happy she had at least one year with him and at the same time sad, she isn’t here to see him grow up.

DIY Make-Up Christmas Cards

This last card was made with nail polish only. Again, I used the blue nail polish to create a background and a green one with a diamond shaped make-up sponge to draw the tree. I then did some simple  decorations on the tree as well.

So today, these cards were made in memory of my grandmother. I used the time I would spend with her to create them and I was thinking of her with every brush stroke and every line. Mama Ana, I miss you so much. These cards are for you and for our special bond that will never go away.

DIY Make-Up Christmas Cards

Until next time, stay beautiful. And hug those close to you especially tight today.

BLOGMAS 2017 #3 Best skincare products 2017

Best skincare products 2017 Blogmas

This Blogmas is not exactly off to a flying start, so today you’ll be enjoying more… artistic photos. But hey, we’re here to discuss skincare, not just look at it, right? Anyway, I apologize in advance ~ if it bothers you terribly, you can always click out of the post. If not, stick around and check out my top products in facial skincare in the past year. I’ll also link any previous related posts so you can catch up on any products you find more interesting.

Best skincare products 2017 – face cleansers

Best skincare products 2017 Blogmas Pixi + Caroline Hirons Natura Siberica

I was always the one to try and save money on face cleansers and in early 2017 I said – no more. My biggest investment so far was the Pixi + Caroline Hirons Double Cleanse and let me tell you, it was worth every cent. I’m totally buying this again! It’s a two sided cleanser with solid cleansing oil (which I use to remove the make-up) and a cleansing cream (used for second cleaning) in one. You only need a tiny amount of each as this jar lasted me almost four months. It doesn’t sting my eyes, removes all the make-up perfectly and is overall fantastic. A definite winner of 2017. Another winner is the Natura Siberica Moisturizing Foam Eye Make-up remover. This was my first time trying out Natura Siberica product and I was very pleasantly surprised. This cleanser will remove most of your make-up (but not a waterproof mascara), will not sting your eyes (99 % natural) and will leave your face nice and clean. I really like that it comes out as a foam which is easily distributed all over my face. I need to do a proper post on this product but again, an absolute favorite.

Best skincare products 2017 – toning and serums

Best skincare products 2017 Blogmas The Ordinary

Our face is now clean, so let’s balance out the PH levels with the Bocassy Clean&Tone Tonic. This is my third bottle and I absolutely love it ~ you can read more about it *here*. Next, we need to give our skin some extra help to make it look young and beautiful. I use all kinds of serums, acids and so forth, but I really want to mention just a few that really work really well for me. First is The Ordinary Hyaluronic Acid 2 % + B5 ~read more about it * here*. I don’t think skincare comes any less expensive then this. I’m sure you’ll be able to find better hyaluronic acids out there, but for just over 5 €, this works great for me. From The Ordinary, I also really enjoy their Salicylic Acid 2 % Solution. I apply this over any breakouts happening on my face and I swear that the healing process is a bit shorter then usual. Last The Ordinary product I want to talk about is the 100 % Plant-derived squalene. It creates a nice barrier on my skin, giving me that extra hydration I really need throughout the night. Along with these, I also enjoy my L’Oreal Revitalift Laser Renew. It’s an eye serum which has a cold metal applicator used to massage the serum into the skin. I don’t know what works better – the serum or the applicator, but on the nights I remember to use it, my under-eye area definitely looks plumper and less sad the next morning.

Best skincare products 2017 – oils and moisturizers

Best skincare products 2017 Blogmas L'Oreal Revitalift

My fave oil remains Yanumi ~ read more about it *here*. It’s cold pressed, 100 % organic and Slovenian, which I’ll always support. For moisturizers, I’m going back and forth between two of them. For daytime, I really like the La Roche-Posay Hydreane Riche moisturizer for sensitive skin. It doesn’t leave a film on my face and absorbs really quickly. That cannot be said for the L’Oreal Revitalift Laser Renew which is a really heavy night-time cream. And that’s exactly why I like it. I really want my face to be hydrated to maximum before I hit the sack and that’s one way to do it. This Revitalift cream has an interesting gel texture that is really pleasant on the face as well.

Best skincare products 2017 – mask, SPF and skin prep

Best skincare products 2017 Blogmas L'Oreal Mask Yanumi

I’m really partial to sheet masks right now, but I talk about them all the time, so this time, I wanted to mention the only “normal” mask in a jar that I really enjoy using. This is my second jar of L’Oreal Pure Clay Exfo Mask. It’s intended to exfoliate the skin and improve skin texture. I only apply it on the parts of my face where I can afford some more serious skin exfoliation and avoid the really dry areas, like the one around my nose and between my eyebrows. I can really see a difference after using this mask.

Best skincare products 2017 Blogmas Serozinc Mommy UV Gel

Best SPF of the year goes to Mommy! UV mild Gel SPF 30 which is alcohol-free, silicone-free and sinks into my skin effortlessly regardless of the moisturizer I’m wearing underneath. I really like the weightless feeling and the fact I don’t need to wait 10 minutes for it to dry enough for me to apply my make-up. Another winner in my book. Last but not least, I have to mention the La Roche-Posay Serozinc that I’ve been loving for the past month or so. It really makes a beautiful base for my make-up and I cannot imagine my life without it. You can read more about it *here*.

Overall, these are all products I’d highly recommend and I am really happy that I found them in 2017. I’ll continue using them until I get new products I need to try out, but I’m happy to know that I can fall back on these anytime if I’m experiencing skin issues and want to get my facial skincare in check.

Now, as the last order of business ~ I owe you the winner of the 10 products in my DIY advent calendar. The lucky winner who will receive 10 great Essence products is:  PATRICIJA VIDMAR. Patricija, congratulations, please send me your information. The rest, thank you for participating. New Blogmas giveaway is coming very, very soon! Until then, stay beautiful!

Blogmas 2017 #1: Make Your Own Advent Calendar + giveaway

Advent Calendar DIY Blogmas 2017

December is FINALLY here and  with it, here is the first post in my Blogmas series. I will be posting every other day, 16 posts in total. We’re also looking at 5 great giveaways, lots of “best of 2017” posts, some DIY and more and more. I’ve been planning Blogmas for months and I am so excited to start!

Today, I want to show you how to make a really simple advent calendar. I know that not everyone can afford to buy one or perhaps you just didn’t find one that would suit your taste. Why not make it yourself – for you, your loved one, your mother, best friend, child? You can include all kinds of different things in it ~ beauty products, candy, DIY supplies, candles or even different tasks, whatever you heart desires. I made a 10-day calendar which can be used in any given 10-day range in December.

Advent calendar DIY supplies

To make an advent calendar, I used: a hot glue gun (you can also use superglue, obviously), some bags, small decorations, washing pins, some paper and ribbons, marker, scissors and a clothes hanger. Instead of the latter, you can also use a tree branch, pin them to a board or arrange them in any other way you wish.

Advent Calendar DIY hanger

First, I decorated the clothes hanger with some pieces of wood and wood stars. You can also use ribbon, glitter or anything else your heart desires. I really like the idea of a hanger because you can literally hang it anywhere in your house. Plus, it’s a wooden one so it fits nicely with the entire idea.

Advent calendar DIY bags

Next, I decorated the 10 bags. I used gold and red bags, but you could also use nice paper bags (or put some stickers on regular paper bags). I like these because they can be re-purposed  once you’re done with your calendar.

Advent Calendar DIY

Next are the numbers. I did a really simple gold paper and just drew the numbers on there. I used the wooden clothes pin to put them on the little bags, but you could also use a safety pin or glue them on.

Advent Calendar DIY

After that, there’s nothing left to do but to hang the bags on the hanger and fill them up!

Advent Calendar DIY

Do you like it? Well, it can be yours! In these bags, there are 10 brand spankin’ new Essence items ~ both from new collection and from limited edition collection. How to win?

1) Like my Facebook page Low Maintenance Beauty

2) Comment under this blog post what you’d like to get for Christmas this year.

3) You can earn one extra entry by sharing this post on your personal page, but this is optional (you can do it to earn 2 entries and increase your chance of winning).

Giveaway is open for Slovenia only. Giveaway will end on 5th of December 2017 and one person will receive all 10 items in the secret giveaway. This person has 3 days to send me their information, otherwise a new winner will be chosen. The winner will be declared in the blog post on 5th of December. This giveaway is not sponsored by Facebook and Facebook is in no way, shape or form connected to this giveaway.

Good luck everyone. Until next time, stay beautiful!